After installing the Moodle and WordPress plugins, the Guided Setup Wizard helps you securely connect both platforms and configure CourseTransit automatically.
Estimated Setup Time: 5–10 minutes
Requirements:
- Moodle administrator access
- WordPress administrator access
- Both CourseTransit plugins installed
Accessing the Setup Wizard (Moodle) #
After installing the CourseTransit plugin, Moodle automatically displays the CourseTransit Settings page during the plugin setup process.
If CourseTransit has not been configured yet, a Setup Incomplete notice is shown along with a Launch Setup Wizard button.
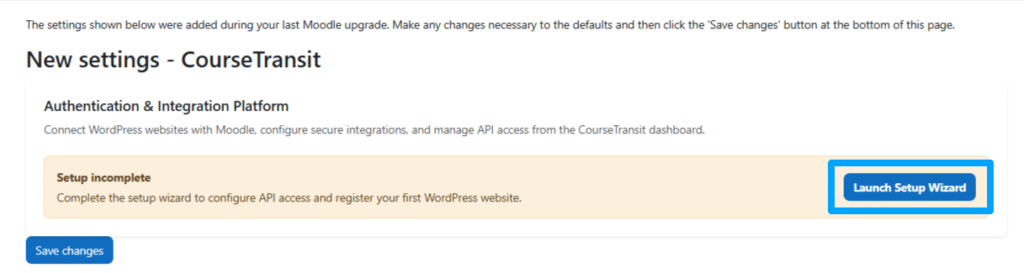
Click Launch Setup Wizard to begin the guided configuration.
Steps are as follows: #
Step 1: Select API User #
- Open the CourseTransit setup wizard
- Locate the “Select API User” section
- Search for an administrator or dedicated integration account
- Select the user
- Click Save Changes
The selected API user determines the permissions CourseTransit will have inside Moodle.
This account is responsible for:
- Course synchronization
- User enrollment operations
- API authentication
- Data access permissions
It is recommended to use a dedicated administrator account for better security and audit tracking.
Step 2: Register WordPress Site #
In this step, you will register your WordPress website with Moodle so both platforms can communicate securely.
- Enter a recognizable Site Name
- Enter your full WordPress Site URL
- Verify the URL is publicly accessible
- Click Add Site
Registering your WordPress site creates a trusted connection between Moodle and WordPress.
This allows:
- Secure API communication
- Course synchronization
- Enrollment processing
- Authentication validation
- Future webhook and sync operations
Only registered websites can communicate with Moodle through CourseTransit.
Step 3: Generate Site Token #
After registering the WordPress website, CourseTransit generates a secure API token used for authentication.
- Copy the generated Site Token
- Store the token securely
- Use this token in the WordPress CourseTransit plugin settings
- Click Go to Dashboard after saving the token
This token acts as a secure authentication key between Moodle and WordPress.
Important:
- The token is shown only once
- Anyone with this token may access CourseTransit APIs
- If the token is lost, a new token must be generated
- Never share the token publicly
Your Moodle-side CourseTransit configuration is now complete and ready for WordPress connection setup.
✓ API user configured
✓ WordPress site registered
✓ Secure token generated
✓ Moodle-side setup completed
WordPress Connection Setup #
After completing the Moodle-side setup, you can now connect your WordPress website to Moodle using the generated site token.
Before proceeding, ensure you have:
- Moodle Site URL
- Generated Site Token
- CourseTransit plugin activated in WordPress
Configure WordPress Connection #
- Log in to your WordPress admin dashboard
- Open CourseTransit from the sidebar menu
- Click Settings
Enter your Moodle platform details to establish a secure connection between WordPress and Moodle.
- Enter your Moodle Site URL
- Paste the generated Web Service Token from Moodle
- Click Save Settings
- Click Test Connection
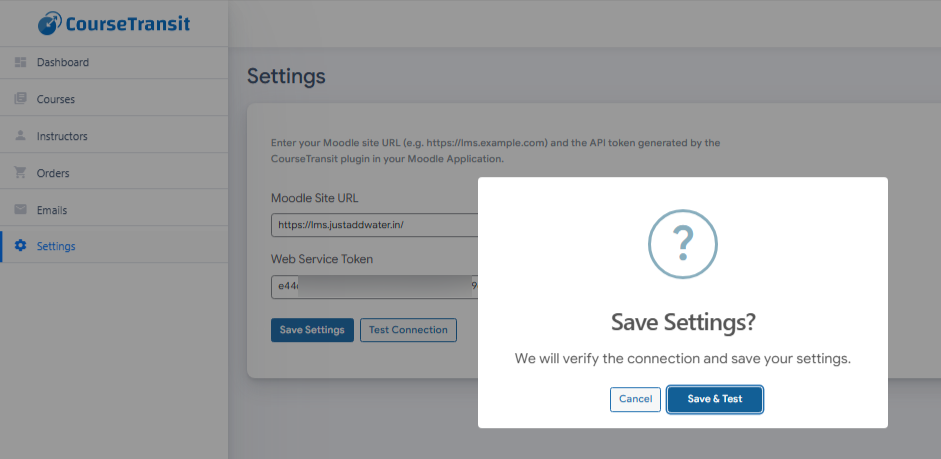
After saving the settings, use the Test Connection button to verify communication between WordPress and Moodle.
Your WordPress website is now connected to Moodle and ready to synchronize courses, enrollments, and user data through CourseTransit.
✓ Moodle API reachable
✓ Token authentication valid
✓ CourseTransit connection active
✓ Ready for synchronization