
CourseTransit allows administrators to customize the email messages sent during course enrollment, bundle purchases, bulk purchases, and quote-related workflows.
From the Email Templates section, you can:
- Customize email subjects and content.
- Configure separate enrollment emails for new and existing users.
- Customize bundle enrollment notifications.
- Configure bulk purchase and quote-related emails.
- Insert dynamic tags to personalize messages.
- Preview, test, and save email templates.
Accessing Email Templates #
- Log in to your WordPress administrator dashboard.
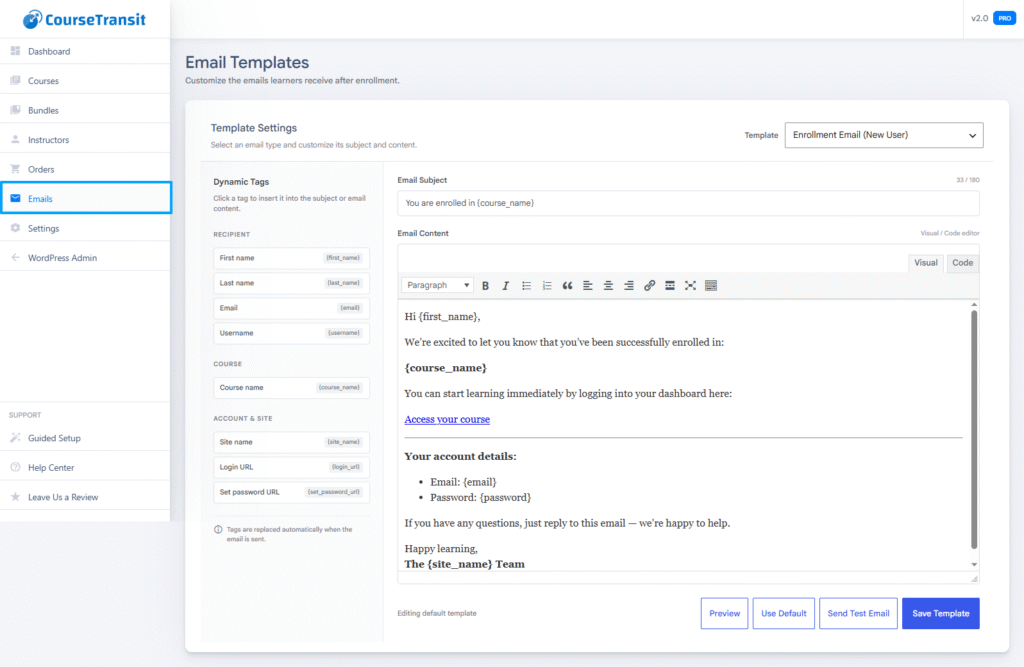
- Navigate to CourseTransit → Emails.
- Select the email template you want to configure.
Available Email Templates #
CourseTransit Pro 2.0.0 provides seven email templates.
1. Enrollment Email (New User) #
Used when a new learner is created and enrolled in a course.
The email can include the course name, account information, and a link for accessing the course or setting a password.
2. Enrollment Email (Existing User) #
Used when an existing learner is enrolled in a course. It provides course access information without treating the learner as a newly created account.
3. Bundle Enrollment Email (New User) #
Used for a new learner receiving access to a purchased course bundle.
The template supports the bundle name, number of included courses, course list, and learning access link.
4. Bundle Enrollment Email (Existing User) #
Used when an existing learner purchases a bundle. It confirms the bundle purchase and provides information about the included courses.
5. Bulk Purchase Confirmation #
Used to confirm a bulk purchase and inform the buyer that the purchased licenses are available.
The email can include the course name, total seats, order number, and a link to manage licenses.
6. Quote Purchase Confirmation #
Used after a quote-based purchase is completed successfully. It can include the course name, number of seats, quote number, order number, and license-management link.
7. Quote Declined #
Used to notify a customer that their quote has been declined. It can include the quote number and a link to view their quotes.
Editing an Email Template #
To customize a template:
- Open CourseTransit → Emails.
- Select the required template from the Template dropdown.
- Edit the Email Subject.
- Update the Email Content using the rich text editor.
- Click Save to store your changes.
Available Actions #
- Use Default Template — Restore the default subject and content for the selected template. Confirm the action when prompted.
- Send Test Email — Enter a recipient email address and send a test using the current subject and content.
- Save — Save the customized template.
ℹ️ Important
Before restoring a default template, make sure you no longer need the current custom content. Loading the default replaces the content being edited.
Dynamic Tags #
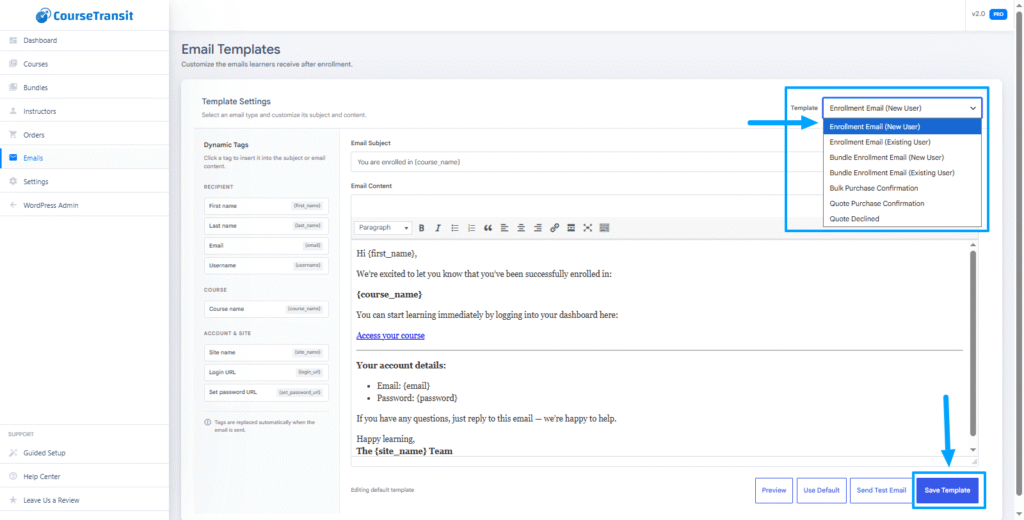
Dynamic tags are placeholders that CourseTransit replaces with relevant information when an email is sent.
The Dynamic Tags panel displays the tags available for the selected template. Click a tag to insert it into the email subject or content.
Available Dynamic Tags
| Tag | Description |
|---|---|
{first_name} |
Recipient’s first name. |
{last_name} |
Recipient’s last name. |
{email} |
Recipient’s email address. |
{course_name} |
Course name. |
{bundle_name} |
Purchased bundle name. |
{course_count} |
Number of courses in a bundle. |
{course_list} |
List of courses included in a bundle. |
{site_name} |
Website name. |
{total_seats} |
Number of seats purchased. |
{order_number} |
Related order number. |
{quote_number} |
Related quote number. |
{my_licenses_url} |
Link to the customer’s license-management page. |
{my_quotes_url} |
Link to the customer’s quotes page. |
{login_url} |
Login or learning-access URL. |
{set_password_url} |
Password setup URL. |
Note: The available tags vary by template. Use the Dynamic Tags panel as the reference for the currently selected template.
Example: Enrollment Email #
Subject
You are enrolled in {course_name}
Content
Hi {first_name},

You have been successfully added to the course:

{course_name}

You can continue learning by logging into your dashboard:

{login_url}

Happy learning,
The {site_name} Team
You can adapt this example to match your organization’s branding and communication style.
Email Editor #
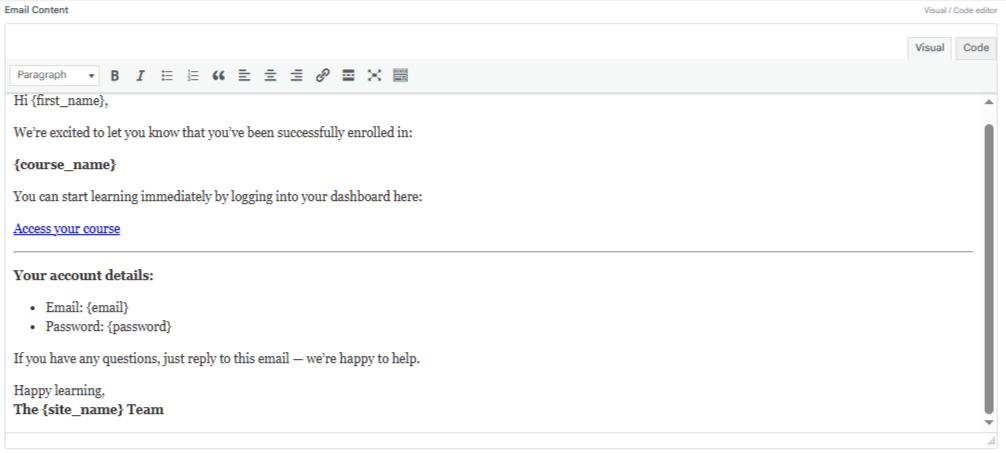
The Email Content editor supports rich text editing, including:
- The Email Content editor supports rich text editing, including:
- Text formatting, such as bold and italic.
- Headings, paragraphs, and lists.
- Hyperlinks.
- Media insertion.
- Additional formatting available through the editor toolbar.
Use these options to create readable, branded email messages.
Best Practices #
- Keep email subjects short and descriptive.
- Use the correct template for each enrollment or purchase workflow.
- Insert the appropriate dynamic tags rather than hardcoding recipient-specific information.
- Verify links and placeholders before saving changes.
- Send a test email before deploying significant template changes.
- Include relevant support information and your organization’s branding.
- Avoid including sensitive information unnecessarily.
Important #
{password}is applicable for newly created users only.- Existing users may not receive password information.
- Incorrect or removed dynamic tags may result in incomplete emails.
Troubleshooting #
Test emails are not received #
- Verify that the recipient email address is correct.
- Check your WordPress email configuration.
- Verify your SMTP configuration, if applicable.
- Check the recipient’s spam or junk folder.
- Review any available mail delivery logs.
Dynamic tags are not replaced #
- Confirm that the tag is supported by the selected template.
- Insert tags using the Dynamic Tags panel.
- Check that the tag spelling and braces match the displayed value.
Template changes are not appearing #
- Confirm that you clicked Save.
- Reopen the template to verify that your changes were saved.
- Send a new test email to check the current template.
Next Step #
Continue to Instructors Management or the relevant CourseTransit configuration guide to continue setting up your integration.


